Are you looking for a modern yet inexpensive system that can help you dehydrate your food? Or just want to turn the material at your home to a decent-looking food dehydrator but don’t know how to?
This post will answer all the questions regarding food dehydrators.
DIY food dehydrators are a very useful and inexpensive way of using the materials and tools that are easily available at home. The functionality of these food dehydrators can be extended depending upon the availability of tools and the requirement.
Before refrigeration, dehydrating was one of the earliest forms of food preservation. since all it required was a safe place to keep the food while all the moisture dried out. Dehydrating foods also concentrate the flavors, so fruit tastes sweeter and herbs are more flavorful than their fresh counterparts.
Let’s talk about the two DIY food dehydrators that you can easily build at home.
Contents
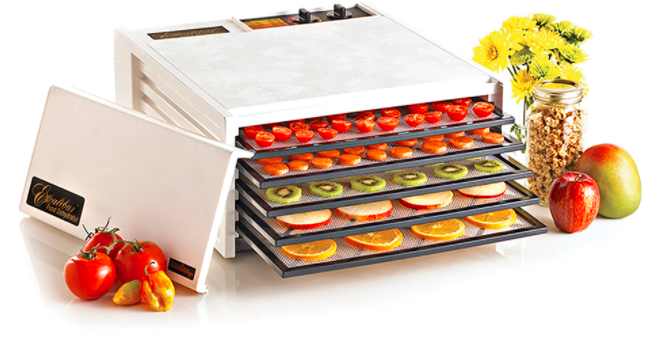
DIY Electric Food Dehydrator
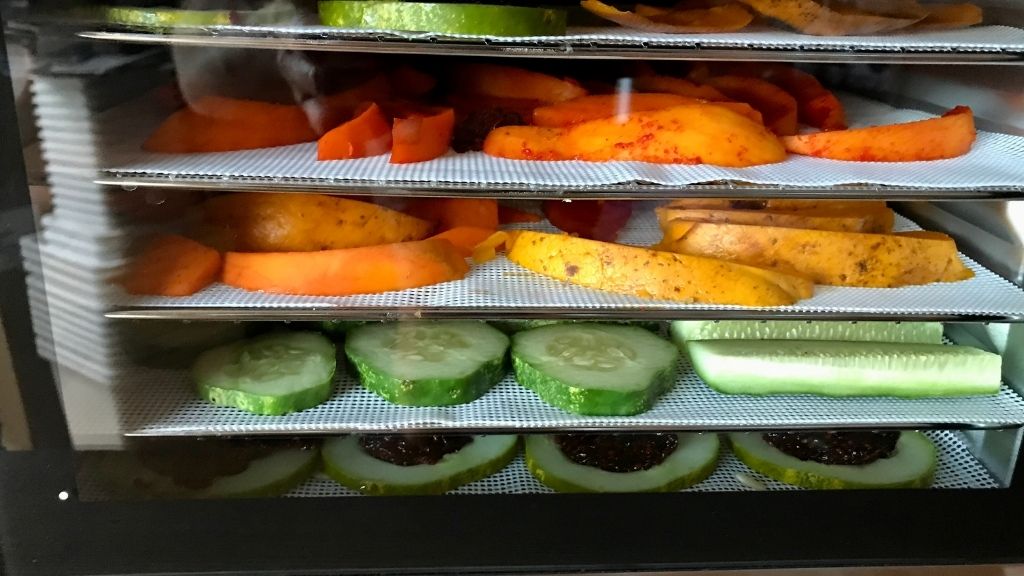
If you already have an electric food dehydrator and is not working fine then there is just one step that can make your dehydrator work.
Carefully analyze the heat source of the dehydrator. In most cases, a fan is attached to the dehydrator that blows warm air onto the food.
See if the hot air is moving all around the dehydrator; otherwise, you need to fix it.
Making a dehydrator at home is also a very easy and inexpensive solution.
Related further reading:
Tools That We Need
Below is the list of items that are usually available at home:
- Slats Made of wood
- Tape
- Racks
- Light source
- Heat source
- Aluminum foil
- Large-sized box. We recommend you take a box that has wings around so that you can close them as well.
Let’s see the steps that can help you make this electric dehydrator.
Step 1: Pick the large-sized cardboard and cover it with aluminum foil from all sides. Carefully place the foil on all four walls of the cardboard. You can use tape to attach the foil with the cardboard. This will make the foil firmly attached to the cardboard.
Step 2: Make a hole in the bottom of the cardboard. The hole should be as big as the size of the heat or the light source. Now fix the heat source inside the hole. It is highly recommended that the hole should be well-insulated and keep the wires of the heat source away from the aluminum foil.
For that, wrap the tape around the wire. Remember, aluminum foil doesn’t keep all the moisture away so that the food remains soft from the inside. There are chances that the moisture stays near the wires, and this can cause short-circuit, thus causing a huge fire danger.
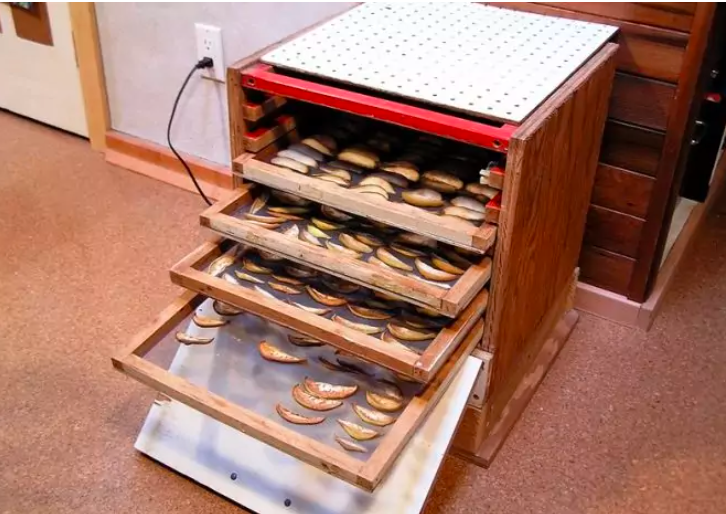
Step 3: Cut holes to the sides and fix the slats or racks through them. The material you use is not limited to the above list, as you can use PVC pipes for this purpose,.
Step 4: Now, you need to make a hole on the top of the cardboard. This hole will let the moisture go away from the dehydrator. You can cut many small holes for this purpose. The holes should not necessarily be at the top of the cardboard. You can cut the holes from anywhere on the cardboard.
Step 5: It’s time to put the racks over the slats so that you can put your food over the rack and dehydrate it.
Step 6: Turn on the heat source and let the food dehydrate. We highly recommend you keep an eye on the box.
You can enhance this system by having many more racks and slats so that you can dehydrate more food at once.
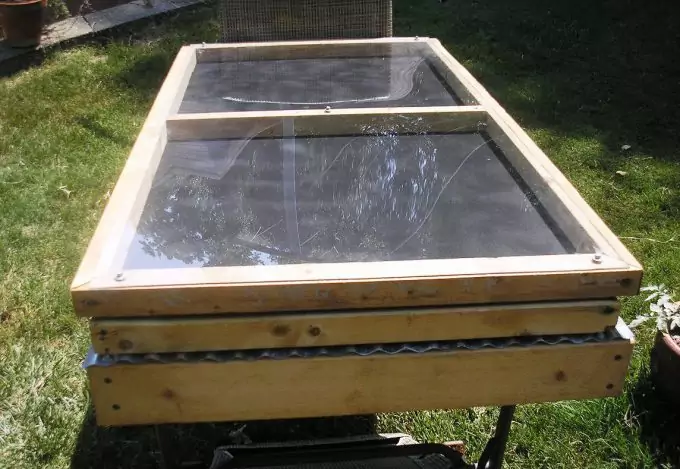
Solar Homemade Food Dehydrator
With the passage of time, people are moving towards the tools using solar heat as they are very easy and simple to use. This is the most inexpensive method and will hardly cost you a cent as everything is done by the sun’s energy.
The actual method behind this dehydrator is to let heat move around the dehydrator but at a varying temperature. High temperature is needed to keep the food away from moisture and low temperature is needed to make the moisture leave the cardboard.
Tools That We Need
Below is the list of items that are easily available at home and you don’t need to rush to the market to grab them.
- Slats made of wood
- Screws and hinges
- Polycarbonate sheet
- Silicone caulk
- Large-sized box.
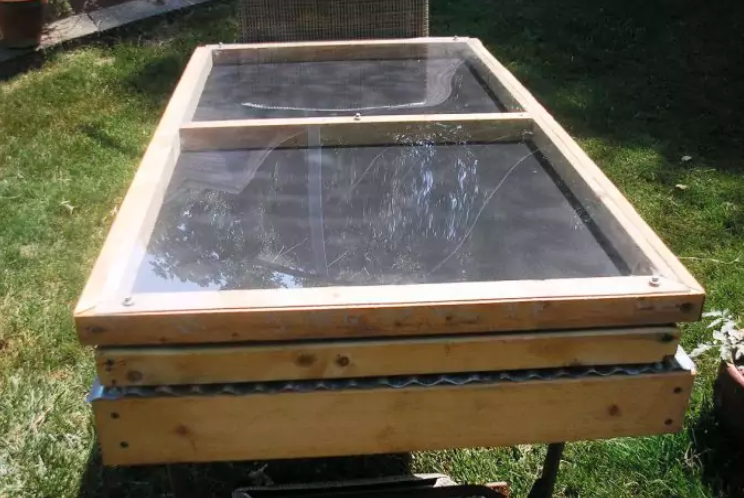
Let’s see the steps to make this solar dehydrator work for you.
Step 1: Take cardboard of any size. It all depends on how big or smaller you want the dehydrator to be. If you want to dry more food at a time, then taking bigger cardboard is a good solution; otherwise small cardboard is enough to have.
Step 2: Keep the cardboard in such a direction that one of its sides directly faces the sun. You can imagine a real solar panel and see how it is placed.
Step 3: You can also use a metal frame instead of using wooden cardboard. The frame must have slats parallel to each other so that you can place racks on them to carry the food.
Step 4: The bottom side of the frame can be used for any ventilation system or a fan. We will cover it with a net cloth.
Step 5: Now, it’s time to make a door frame. The shape of the door frame will be a rectangle, and its face will be towards you. We will attach it to the rest of the frame in the last step.
Step 6: As you have to place the trays inside the dehydrator, we prefer using wooden trays as they can be easily attached to the opposite sides of the frame. Place the trays so that they are exactly parallel to each other.
Step 7: It’s time to use a polycarbonate sheet to wrap all around the side that faces the sun. You can also cover the sides of the frame and the door with this sheet if you have it in a large quantity. Cutting this sheet is not that easy as it will require you to have a box cutter. Another option is to galvanize the sheet from where you want to cut it.
Step 8: To attach the sheet firmly to the frame, make holes with a drill machine and use screws to cover it. Don’t cover all the holes with screws to make a good ventilation system. Cover these holes with a net cloth. This makes sure that no insects come in while the food is being dehydrated.
Step 9: Try to seal all the edges with silicone caulk. This, too will make sure that no insects will come in contact while your food is being dehydrated. Paint all the sides of the frame with black color as black can attract heat and will keep the heat inside it for a longer period of time.
Step 10: Make trays, either metallic or wooden, and attach them to the frame with the help of screws. Make sure all the trays are parallel to each other, and you can place as many trays as you want.
Step 11: It’s time to attach the door to the frame using the hinges and the screws. Paint it all black as well.
Step 12: Leave it in the sun for many days so that the paint and the other smells escape. If you don’t let it stay in the sun, then the smell will mingle in your food and will give a bad taste as well.
You can extend this procedure to many other materials as well. Using a thermometer inside a dehydrator is a very good idea. The ideal temperature must be 130 degrees Fahrenheit to dehydrate the food at its best. If the temperature is lower, you can close the vents so that the heat can’t escape the dehydrator.
Recommended further reading:
Freeze-Dried Food vs Dehydrated Food
Let’s see a quick difference between both of these.
| Difference | Freeze-Dried Food | Dehydrated Food |
| Preservation Process | In this process, a meal is completely frozen, and there remains no oxygen or air when they are in their gas state. This process has a longer shelf life and never affects the nutritional value of the food. | Moisture is taken out at a very high temperature when food is dehydrated. This process enlarges the shelf life but also affects the nutritional value of the food. |
| Shelf Life | At least 25 years | At least 7 and can be extended to 10 years. |
| Calories | Contains 300 calories in one serving dish. | Adds 100 to 150 calories in one serving. |
| Preparation Time | It takes 10 minutes to freeze-dried foods. | It takes 30 minutes to dehydrate the food. |
| Packaging | Freeze-dried foods mostly come in enamel-coated or nitrogen flushed ti cans. This not only increases the shelf life but also ensures safety from insects, rodents, or even water. | Mostly available in pouches in different sizes. Dehydrated foods are mostly kept in plastic containers. |
Frequently Asked Questions
Can you dehydrate at 200 degrees?
Dehydration depends on the temperature of the oven. The best results of dehydration come when the temperature of the oven is almost equal to 200 degrees but many ovens do not come with a built-in option of 200 degrees temperature.
Do dehydrators use heat?
Oven and dehydrators both spread air for an extended period of time at lower temperatures. The oven cooks food while dehydrators take humidity or moisture out of the food. In this way, food dehydrated using dehydrated food is often tastier and stays longer. The dehydrator dries the food at very low temperatures, while all ovens do not have such low temperatures.
Is a dehydrator better than an oven?
Just like an oven does, a food dehydrator cooks food at a very low and constant temperature. It also lets a sufficient amount of air come in so that the food remains moist and soft from inside. Even if at high temperatures, food gets dry from outside but stays soft from inside in a food dehydrator. So, you can conclude a food dehydrator is better than an oven.
Can you use an air fryer as a dehydrator?
Yes, but it needs to be set so that it provides the results much as a dehydrator does. Just set the temperature at 130 degrees Fahrenheit and let it cook for 4 hours.
Final words
These DIY dehydrators are very easy to build, and they use materials that are easily accessible and possibly can be found in your home. Buying a dehydrator is also not very expensive.
Do share your experience with us, and if you’ve found this article helpful, share it with your friends as well.